PowerShellによって図形のテキストボックスの位置、色(背景色、文字色)、書式(太字、斜体、下線、取消線)を設定するコードが、あまりWeb上に見つからないのでサンプルコードを作ってみました。
仕様
下記のようなPowerShellのScript(*.ps1)と、編集先のExcelファイルを用意します。

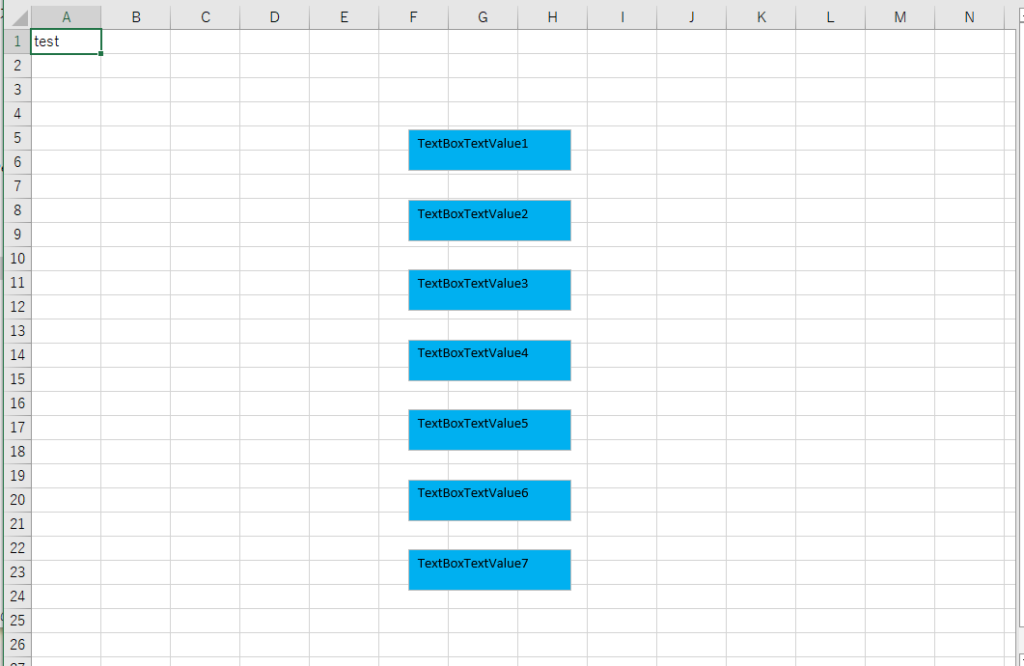
Excelファイルの中にいくつかテキストボックスを配置して、PowerShellからこれらのテキストボックスの位置や色、書式を変更してみたいと思います。

ソースコード
Excelファイルを1ファイル読み取って、中にある図形については個別に編集します。
changeSettingsExcelTextBox.ps1
$excel = New-Object -ComObject Excel.Application
$book = $null

$excel.Visible = $false
$excel.DisplayAlerts = $false

$fileName  = "Book1.xlsx"
$filePath = (Convert-Path .) + "/" + $fileName

$book = $excel.Workbooks.Open($filePath)
$sheet = $book.Sheets("Sheet1")


# 図形1:位置調整
$shape = $sheet.Shapes(1)
$shape.Top  = 20          # 上から20ポイント
$shape.Left  = 10         # 左から10ポイント

# 図形2:背景色変更
$shape = $sheet.Shapes(2).Fill.ForeColor.RGB = 0xFF0000 #赤色

# 図形3:文字色変更
$shape = $sheet.Shapes(3).TextFrame().Characters().Font().Color = 0x00FF00 #緑色

# 図形4:太字
$shape = $sheet.Shapes(4).TextFrame().Characters().Font().Bold = $True

# 図形5:斜体
$shape = $sheet.Shapes(5).TextFrame().Characters().Font().Italic = $True

# 図形6:下線
$Underline = "microsoft.office.interop.excel.xlUnderlineStyle" -as [type]
$shape = $sheet.Shapes(6).TextFrame().Characters().Font().Underline = $Underline::xlUnderlineStyleSingle

# 図形7:取り消し線
$shape = $sheet.Shapes(7).TextFrame().Characters().Font().Strikethrough = $True


[void]$book.Save()
[void]$book.Close($false)
[void][System.Runtime.Interopservices.Marshal]::ReleaseComObject($book)

[void]$excel.Quit()
[void][System.Runtime.Interopservices.Marshal]::ReleaseComObject($excel)

Pause
少し解説しますと、下記の箇所は、図形1をExcelの左上から見て下に20ポイント、右に10ポイントの位置に移動します。
$shape = $sheet.Shapes(1)
$shape.Top  = 20          # 上から20ポイント
$shape.Left  = 10         # 左から10ポイント
下記の箇所は図形2の背景色を赤色に変更しています。(1行にまとめました)
$shape = $sheet.Shapes(2).Fill.ForeColor.RGB = 0xFF0000 #赤色
残りの部分はCharacters().Font()をいじって中の文字列をいじっています。
ここはFontのリファレンスを細かく見れば色々分かるので、細かいところは割愛しようかと思います。
# 図形3:文字色変更
$shape = $sheet.Shapes(3).TextFrame().Characters().Font().Color = 0x00FF00 #緑色

# 図形4:太字
$shape = $sheet.Shapes(4).TextFrame().Characters().Font().Bold = $True

# 図形5:斜体
$shape = $sheet.Shapes(5).TextFrame().Characters().Font().Italic = $True

# 図形6:下線
$Underline = "microsoft.office.interop.excel.xlUnderlineStyle" -as [type]
$shape = $sheet.Shapes(6).TextFrame().Characters().Font().Underline = $Underline::xlUnderlineStyleSingle

# 図形7:取り消し線
$shape = $sheet.Shapes(7).TextFrame().Characters().Font().Strikethrough = $True
取消線の参考
ただ、下線だけは二重下線とかいくつか選択肢があることに注意です。
そのため、$true、$falseではなく、特別な値を指定するのがポイントなので、設定値については参考のため一覧を残しておきます。
| 設定値 | 値 | 説明 |
|---|---|---|
| xlUnderlineStyleDouble | -4119 | 太い二重下線 |
| xlUnderlineStyleDoubleAccounting | 5 | 並んだ 2 本の細い下線 |
| xlUnderlineStyleNone | -4142 | 下線なし |
| xlUnderlineStyleSingle | 2 | 一重下線 |
テスト実行
実行前
先ほど説明の通り、実行前は適当なテキストボックスが配置されています。

Excelの状態を確認できたらファイルは閉じます。
それから下記の通り「changeSettingsExcelTextBox.ps1」を選択して、右クリックメニューから「PowerShellで実行」をクリックします。

すると、下記のようにPowerShellの実行が確認できます。

実行後
では実行が終わったので、「Book1.xlsx」のExcelファイルを再度開きます。
すると下記の通り、各図形の位置や色、中のテキストの書式が変更されていることが確認できました。

参考情報
下記の環境で作成・実行しております。
| No. | 環境 | バージョン |
|---|---|---|
| 1 | OS | Windows10 |
| 2 | PowerShell | 5.1 |
以上です。

